
Birthday Cake!
Wednesday, October 19, 2016
I hope you are having a wonderful day!
So if you follow me on Twitter you'll know it was my mum's birthday on the 13th October and it's now a tradition to make a birthday cake on someone's birthday instead of going to the shop to buy one already made. We started this tradition off when I really wanted a cake for my birthday which was surrounded in KitKats and the top was covered in chocolate M&M's and ever since we have made a birthday cake on everyone's birthday in what ever style they would like it to be.
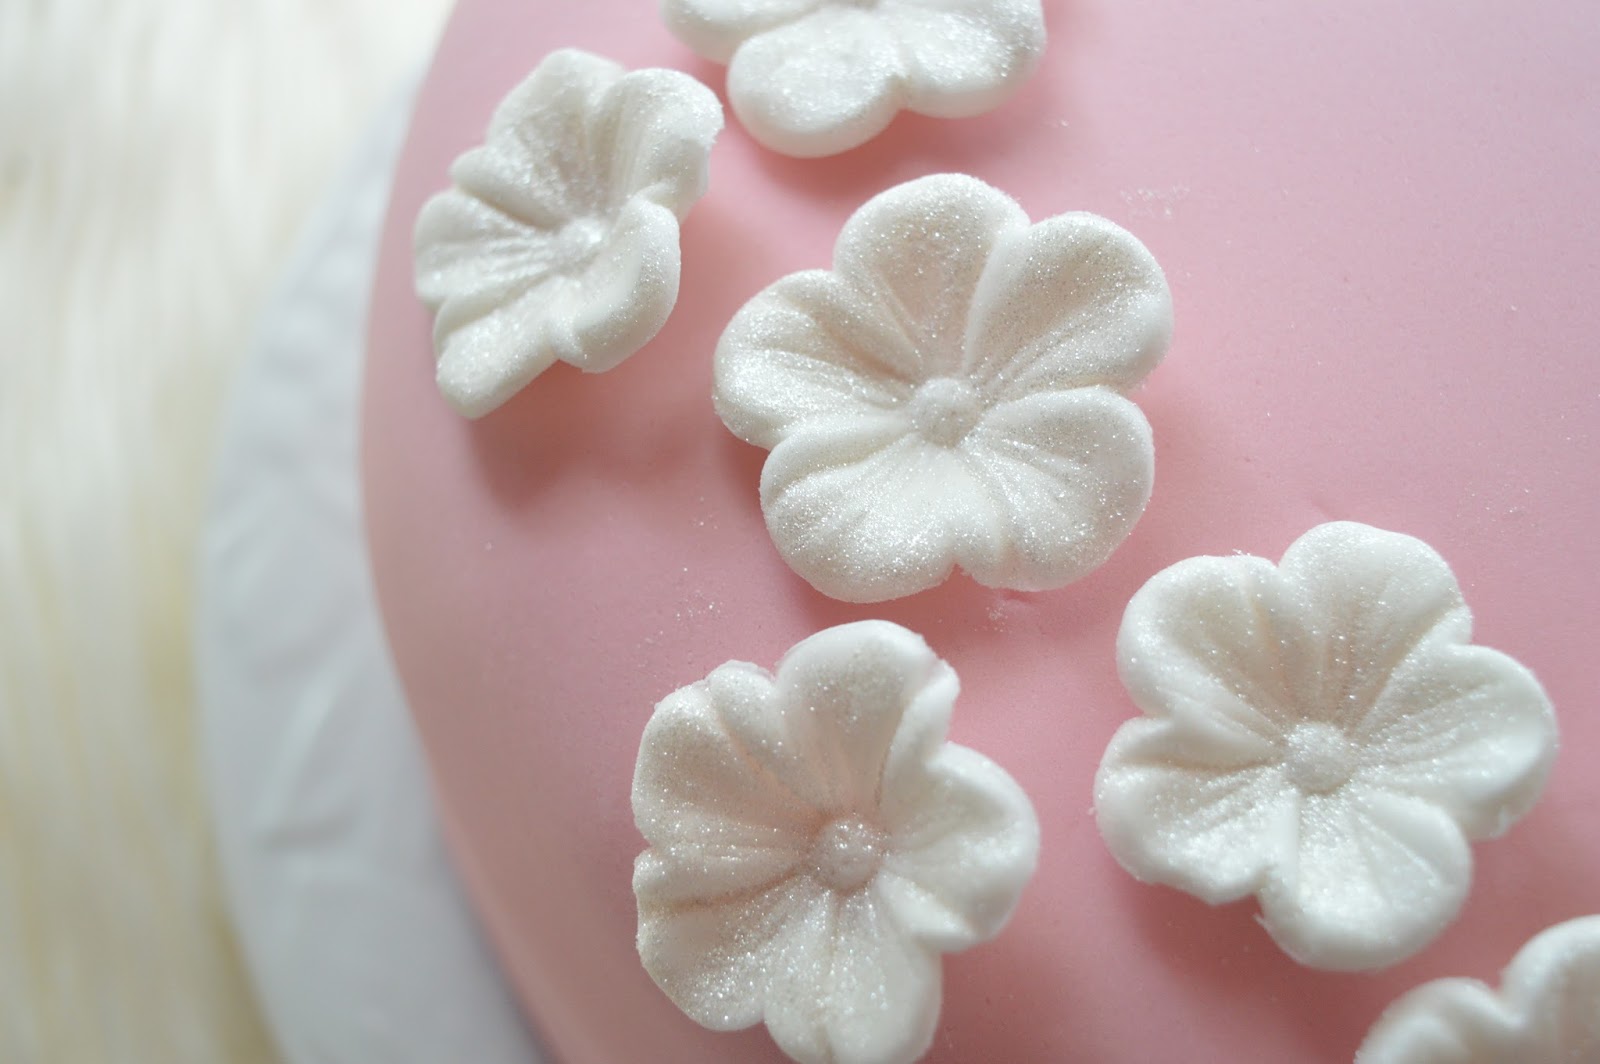
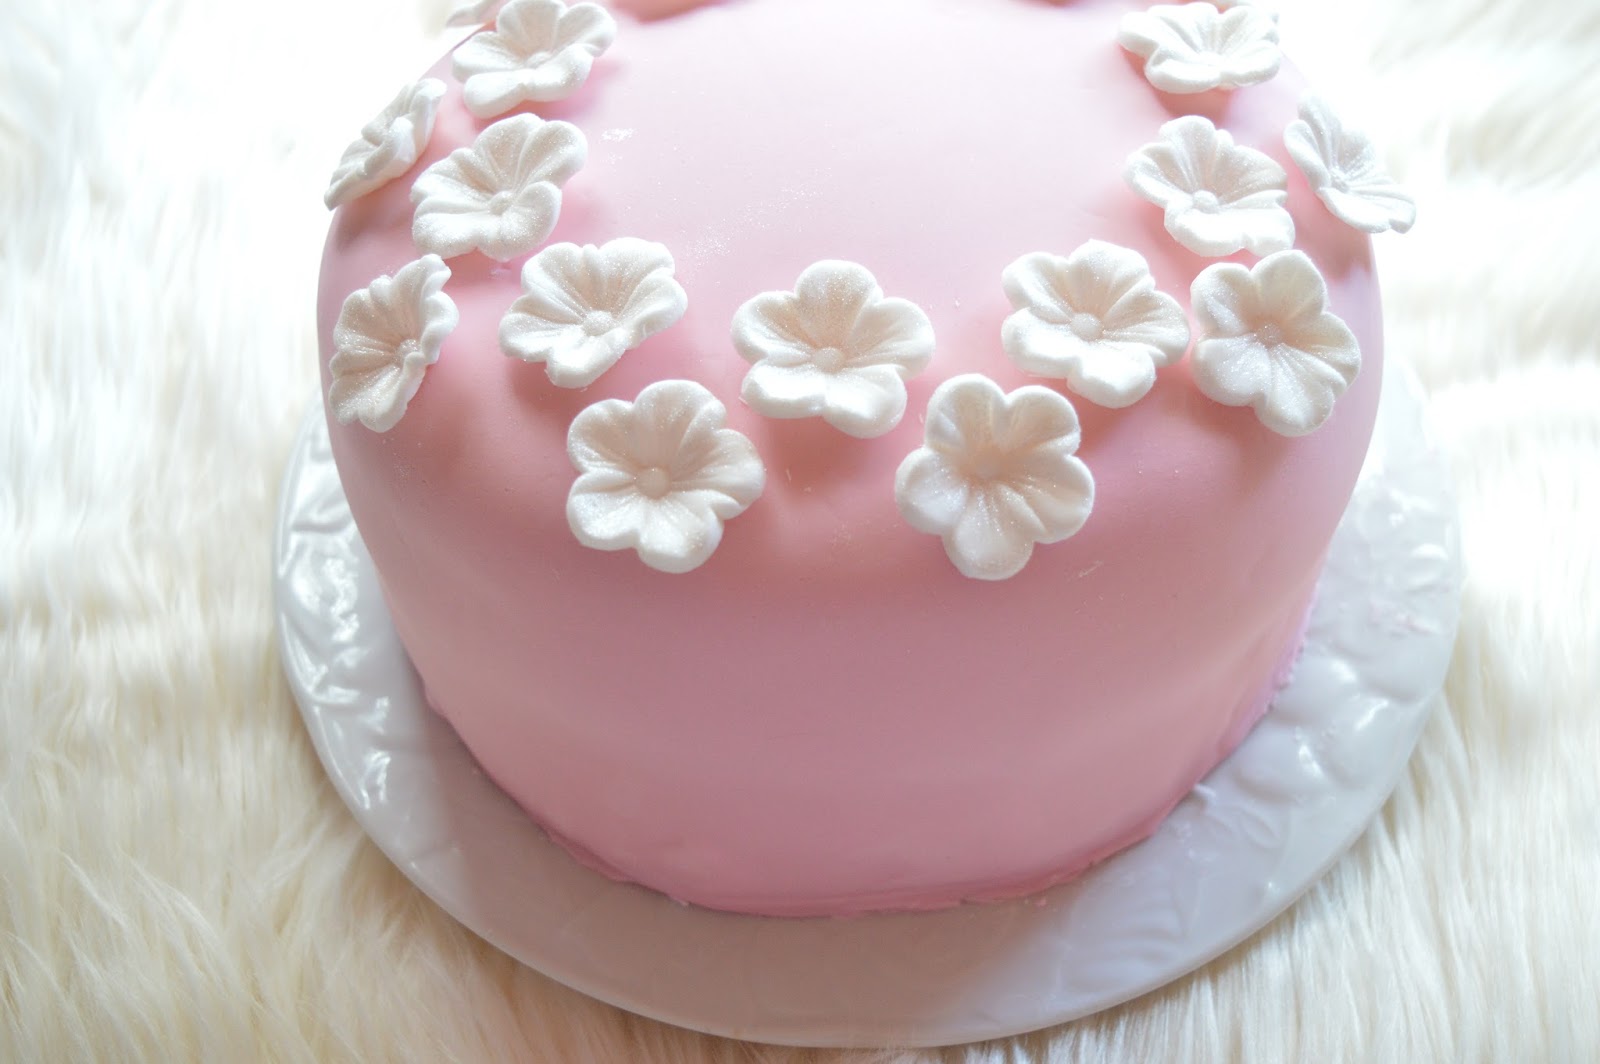
This year I wanted to make a birthday cake for my mum which was covered in piped roses but only on half of the cake. The rest of the cake would then be covered in frosting, but smoothed all the way round with piping going around the top of the cake. However, I had a slight dilemma with icing and no matter how many times myself and my mum tried to make the frosting in our stand mixer, it refused to work out so we ended up with only a little bit of icing and I didn't have enough to ice the cake and then pipe roses on. I was absolutely gutted! However, I did have enough frosting to crumb coat the cake so I had the option of covering the cake with fondant icing instead once I had crumb coated it and left in the fridge to cool.
If you'd like to create this cake then carry on reading for the Recipe!
For the cake you will need;
50g cocoa powder
100g dark brown sugar
250ml recently boiled water
225g plain flour
1/2tsp baking powder
1/2tsp bicarbonate of soda
125g butter at room temperature
150g sugar
2tsp vanilla extract
2 eggs
To make the cake;
Preheat your oven to 180 degrees Celsius.
In a jug measure out 250ml of recently boiled water. Place the jug onto your scales and add 50g cocoa powder and 100g of dark brown sugar. Mix this together until it is smooth and has no lumps!
In a small bowl sift together 225g plain flour, 1/2tsp baking powder and 1/2tsp of bicarbonate of soda so there's no lumps.
On a stand mixer (or in my case, a large bowl and a electric hand whisk) whisk 125g butter and 150g of sugar together until pale and fluffy. Then add your 2tsp vanilla extract. Whisk and add your two eggs and then whisk again until incorporated.
Alternatively add in your dry ingredients and then the liquid in three additions, mixing in between so everything is incorporated!
Pour evenly into two lined 7 and a 1/2 inch cake tins and place in the oven at 180 degrees Celsius for 30 minutes.
(I made this twice so I had four layers)
6 large egg whites at room temperature
12oz granulated or caste sugar
8oz icing sugar sifted
Food colouring gel
To make the frosting;
In a small saucepan fill to 1 inch or less with water. Place a metal bowl on top and ensure the bottom of the bowl does not touch the water. If it does, find a smaller saucepan or use a larger bowl.
Heat the water to a rapid simmer and then add the egg white into the metal bowl with the caster or granulated sugar (depending which one you're using).
Mix this together with your hand until the sugar has dissolved and the temperature is about 150 degrees Fahrenheit; then remove from the heat.
Place the bowl on the stand mixer, or if you're using an electric hand whisk, turn these on to high speed and whisk until the egg whites are firm and to a stiff peak.
Add all of the icing sugar and mix slowly at first so you do not end up with a cloud of sugar, and then gradually turn the speed up until the mixture has no lumps in. (During this stage, add in the food colouring gel of your choice till it's your desired colour).

Take the cake back out of the fridge and add the rest of the frosting to the top of your cake and around the outside. This does not have to be perfect as you'll be covering the cake in fondant icing. Place back into the fridge until you have rolled out your fondant!
Roll out your desired fondant to a 15 inch circle and so it is around 3-5mm thick. You will need 1kg of fondant icing to ensure this is the correct thickness and size for your cake, any less and it will not work without splitting or cracking.

At this stage you can either put your cake back into the fridge, or you can keep it in a container which is big enough. We have a baking oven, so I place the oven in there on a plate so I know it is away from flies, dirt etc and it is still kept fresh.

Let me know if you create this cake! I would love to see it and let me know if you'd like to see more baking posts on my blog!
I'll see you soon
Kimberley Jessica
______________________________________
Fancy treating yourself over on Coconut Lane?
Use the code "kimberleyjessica20" at the checkout to redeem 20% off!
______________________________________
Twitter; @kimmcpherson_
Instagram; @_kimberleyjessica
Facebook; Kimberleyjessicablog
Bloglovin; Kimberley Jessica
Snapchat: @kim_mcpherson


8 comments
This looks gorgeous babe! I would love to be able to make one of these myself!! 🌸💕💫✨
ReplyDeleteWith love, Alisha Valerie. x
www.AlishaValerie.com || www.twitter.com/AlishaValerie
Love how cute and delicate this looks! Loved the post x
ReplyDeleteSoph xoxo
http://planetwhispers.blogspot.co.uk
This has to be the coolest cake ever ! Love your blog .Keep in touch beautyfruity17@blogspot.com
ReplyDeleteomggg this is so pretty!! so talented!! xox
ReplyDeleteLiterally love your posts I want you to bake me a cake haha these look so good !! pixie xx www.pixieox.co
ReplyDeleteThat looks amazing and so incredibly arty! I especially love the lil addition of the flowers, makes it look so incredibly professional! Great post lovely. X
ReplyDeleteThe cake looks delicious! I would love to try making it xo
ReplyDeleteAlina
http://alinasirbu.uk
Kim that's so pretty! I know who I'll be coming to for my birthday cake ��
ReplyDelete